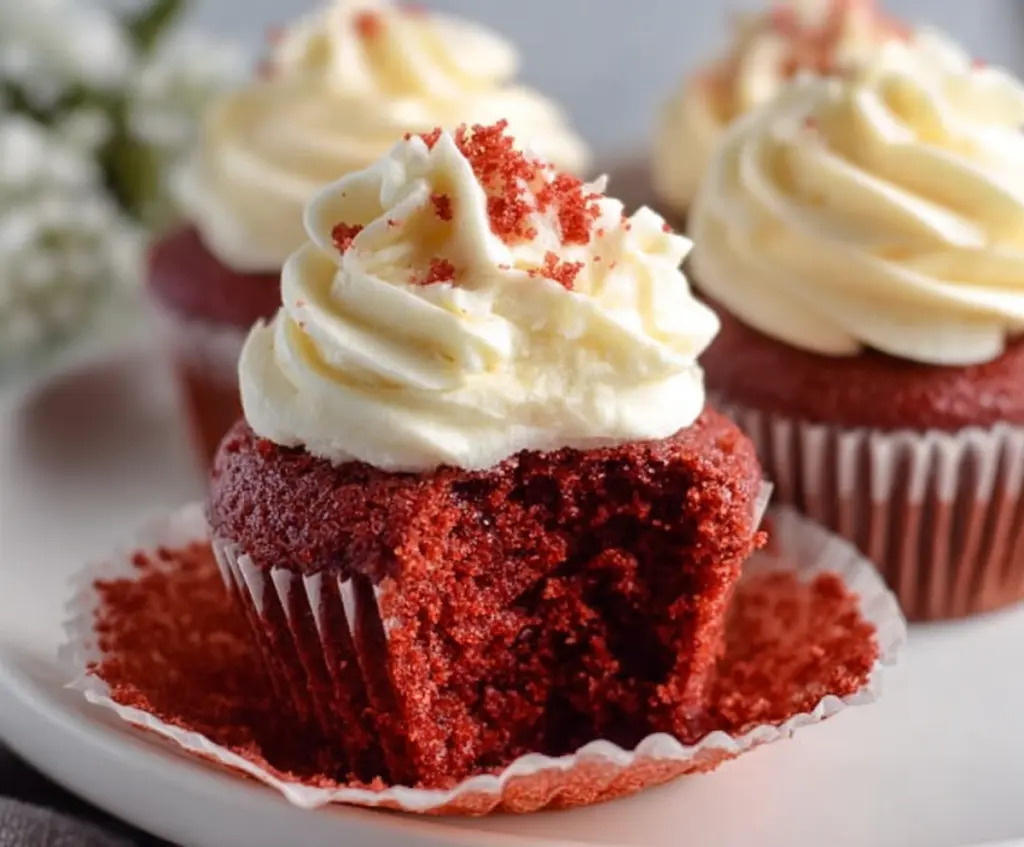
These small batch red velvet cupcakes are moist, fluffy, and oh-so-yummy! With a hint of cocoa and a bright red color, they bring a fun twist to your treat time.
Who can resist that cream cheese frosting on top? I like to bake just a few so I can enjoy them without feeling guilty. Perfect for a mini celebration or just because! 🎉
Key Ingredients & Substitutions
All-purpose flour: The backbone of the cupcakes. You can use a gluten-free all-purpose flour if you’re avoiding gluten. I find that brands like Bob’s Red Mill work well.
Buttermilk: It adds moisture and tang. If you don’t have it, mix 1/4 cup milk with a teaspoon of white vinegar or lemon juice and let it sit for 5 minutes as a great substitute.
Egg: This gives structure and moisture. For a vegan option, replace it with 1/4 cup unsweetened applesauce or a flax egg (1 tablespoon flaxseed meal + 2.5 tablespoons water, stirred and let sit).
Red food coloring: Provides that classic red hue. If you prefer a natural approach, consider using beet juice, but it might alter the cupcake’s texture slightly.
Cream cheese: For the frosting, this creates a rich flavor. You can substitute with mascarpone for a different taste or a dairy-free cream cheese if needed.
What’s the Best Way to Ensure My Cupcakes Rise Perfectly?
Achieving perfectly risen cupcakes starts with your baking technique. Here are a few tips:
- Measure ingredients accurately, especially the flour. Too much can make cupcakes dense.
- Preheat your oven completely before baking. This helps the cupcakes start cooking right away.
- Avoid overmixing the batter. Mix just until everything is combined to keep them light and airy.
- Fill the cupcake liners about 2/3 full for the best rise and avoid overflow.

Small Batch Red Velvet Cupcakes
Ingredients:
For the Cupcakes:
- 1/2 cup all-purpose flour
- 1/4 cup granulated sugar
- 1/4 teaspoon baking soda
- 1 tablespoon unsweetened cocoa powder
- 1/8 teaspoon salt
- 1/4 cup buttermilk
- 2 tablespoons vegetable oil
- 1 large egg
- 1/2 teaspoon vanilla extract
- 1 teaspoon distilled white vinegar
- 1 tablespoon red food coloring
For the Cream Cheese Frosting:
- 4 oz cream cheese, softened
- 2 tablespoons unsalted butter, softened
- 3/4 cup powdered sugar, sifted
- 1/2 teaspoon vanilla extract
How Much Time Will You Need?
This small batch recipe will take about 30 minutes total—10 minutes for prep and 18-20 minutes for baking. Make sure to let the cupcakes cool for a bit before you frost them, so you can enjoy them at their best!
Step-by-Step Instructions:
1. Preheat the Oven and Prepare the Muffin Tin:
First things first, let’s get that oven preheating to 350°F (175°C). Grab a muffin tin and line it with 4 cupcake liners. This helps with easy cleanup and makes your cupcakes look pretty!
2. Mix the Dry Ingredients:
In a medium bowl, whisk together the all-purpose flour, granulated sugar, baking soda, cocoa powder, and salt. This will be the dry base for your delicious cupcakes.
3. Combine the Wet Ingredients:
In another bowl, whisk the buttermilk, vegetable oil, egg, vanilla extract, vinegar, and red food coloring until everything is nicely blended together. The red food coloring is what gives these cupcakes their signature color!
4. Mix It All Together:
Now, pour the wet mixture into your bowl of dry ingredients. Mix it gently with a spatula or wooden spoon until just combined. Be careful not to overmix; it’s okay if there are a few small lumps!
5. Fill the Cupcake Liners:
Divide the batter evenly among the cupcake liners, filling each about two-thirds full. This allows them to rise without overflowing.
6. Bake the Cupcakes:
Pop the muffin tin in the oven and bake for 18-20 minutes. You’ll know they’re done when a toothpick inserted in the center comes out clean. If it comes out with batter, give them a little more time!
7. Cool Down:
Once baked, remove the cupcakes from the oven and allow them to cool completely on a wire rack. This step is important so the frosting doesn’t melt!
8. Prepare the Cream Cheese Frosting:
In a bowl, beat the softened cream cheese and butter together until creamy. Then, add the sifted powdered sugar and vanilla extract, and beat until it’s smooth and fluffy. It should be spreadable yet firm!
9. Frost the Cupcakes:
Now for the fun part! Use a piping bag or a knife to spread the cream cheese frosting generously on top of the cooled cupcakes. Don’t be shy; more frosting is always better!
10. Optional Toppings:
For a special touch, sprinkle the tops with some red velvet crumbs or even some cute sprinkles. It makes them look fancy!
11. Serve and Enjoy:
Serve your small batch red velvet cupcakes to friends, family, or enjoy them all by yourself. Either way, they’re sure to be a hit!
Can I Use Regular Milk Instead of Buttermilk?
Yes, you can! If you don’t have buttermilk on hand, simply mix 1/4 cup of regular milk with 1 teaspoon of white vinegar or lemon juice and let it sit for about 5 minutes. This will mimic the acidity of buttermilk.
How Do I Store Leftover Cupcakes?
Store any leftover cupcakes in an airtight container at room temperature for up to 2 days. If you have frosting left, consider refrigerating it separately. You can also refrigerate the frosted cupcakes for up to 3 days; just bring them to room temperature before serving!
Can I Freeze the Cupcakes?
Absolutely! Once cooled, wrap the unfrosted cupcakes tightly in plastic wrap and place them in a freezer-safe bag. They’ll keep well for up to 2 months. When ready to enjoy, thaw them in the fridge overnight and frost them the next day!
What If I Don’t Have Red Food Coloring?
If you’re out of red food coloring, you can use beet juice as a natural alternative, or simply leave it out. However, the cupcakes will be more chocolate-colored rather than the signature red. The flavor will still be delicious!